Overview
A notification event is securely sent to Cello through the webhook endpoint every time a customer makes a purchase or a customer record is created or updated. Cello checks these events to perform the following actions:- Determine if a reward for the referrer needs to be created and paid out
- Inform the referrer about new signups and rewards
- Cancel recurring rewards if a subscription is cancelled
Endpoint URLs
You will find the webhook endpoint URL for both Sandbox and Production environments in the Cello Portal Webhooks page.Securing the webhook
To secure the webhook in Step 5, you will find credentials for both Sandbox and Production environments in Cello Portal Webhooks page.Connecting Chargebee
Prerequisites
Before configuring webhooks, ensure your Chargebee customers include the required Cello attribution fields. These information enables proper attribution and reward tracking.When to add additional fields:
- If you create Chargebee customers at signup → You would have already added metadata or custom fields to the customer during the Setup Step “Track Signups”
- If you create Chargebee customers at purchase → Make sure to add metadata or custom fields when creating the customer
Required Chargebee Customer attribution fields
You can also choose to use Chargebee custom fields (CF_) to add referral data to the event. Learn more about custom fields in the Chargebee documentation
meta_data attribute or as a cf_ custom field.
| Field | Description | Chargebee Object |
|---|---|---|
cello_ucc | Referral code identifying the referrer | Customer Object to meta_data attribute or as a cf_ custom field |
new_user_id | Your system’s unique user ID. Same as productUserId used in Referral Component when booting the SDK | Customer Object to meta_data attribute or as a cf_ custom field |
new_user_organization_id | Organization ID (optional). Required only for organization-level referrals and rewards | Customer Object to meta_data attribute or as a cf_ custom field |
coupon | New user discount code. Learn how to apply discounts in this guide. | Customer Object to meta_data attribute or as a cf_ custom field |
Steps
You will add a webhook to your Chargebee configuration to connect Chargebee and Cello. This can be done in both test and production environments separately.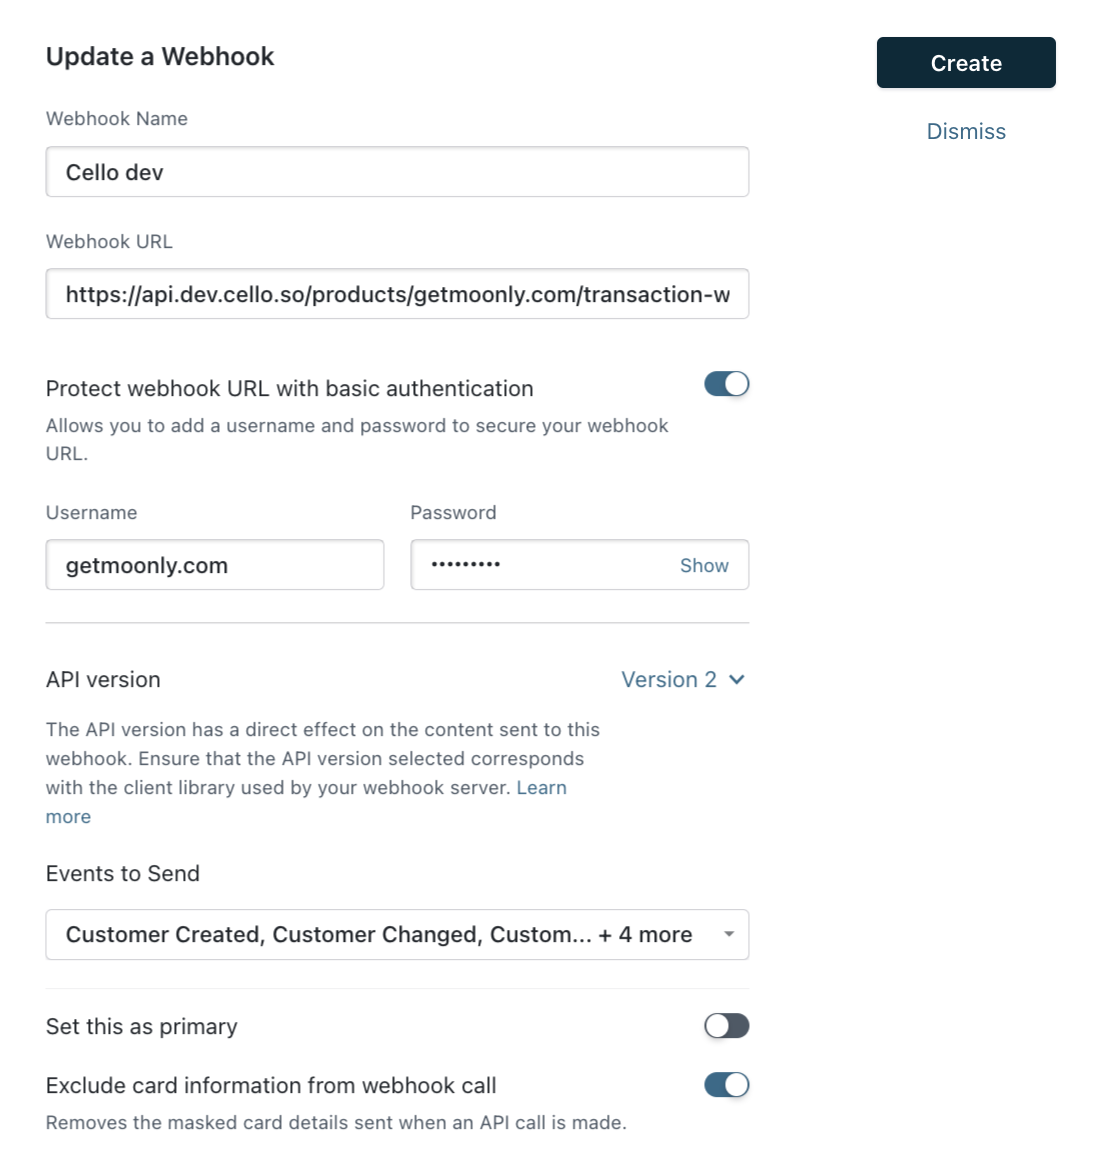
1
Log into your Chargebee Dashboard
2
Add a new Webhook
From the sidebar, select Settings > Configure Chargebee and click on “Webhooks”. Next Click on ”+ Add Webhook”.
3
Enter the Endpoint URL
Choose the Endpoint URL corresponding to the environment you are setting up: Sandbox or Production.
4
Select the events to send
Select the events you want to send under “Events to Send”:
Customer Created,Customer Changed,Customer DeletedPayment Succeeded,Payment Refunded,Payment Failed
5
Secure the webhook
Select “Protect webhook URL with basic authentication” and add the
product_id and secret provided in the Cello Portal.6
Click "Create" to enable the webhook
Webhook created!